
How to add an Audio Shake Effect
Today, we want to share you a cool special effect. You must see it for tens of times but don't know how to do it. It is called Audio Shake Effect. And you can use it to make the word, image or video shake with the music beats.
Let’s see how to add audio shake effect.
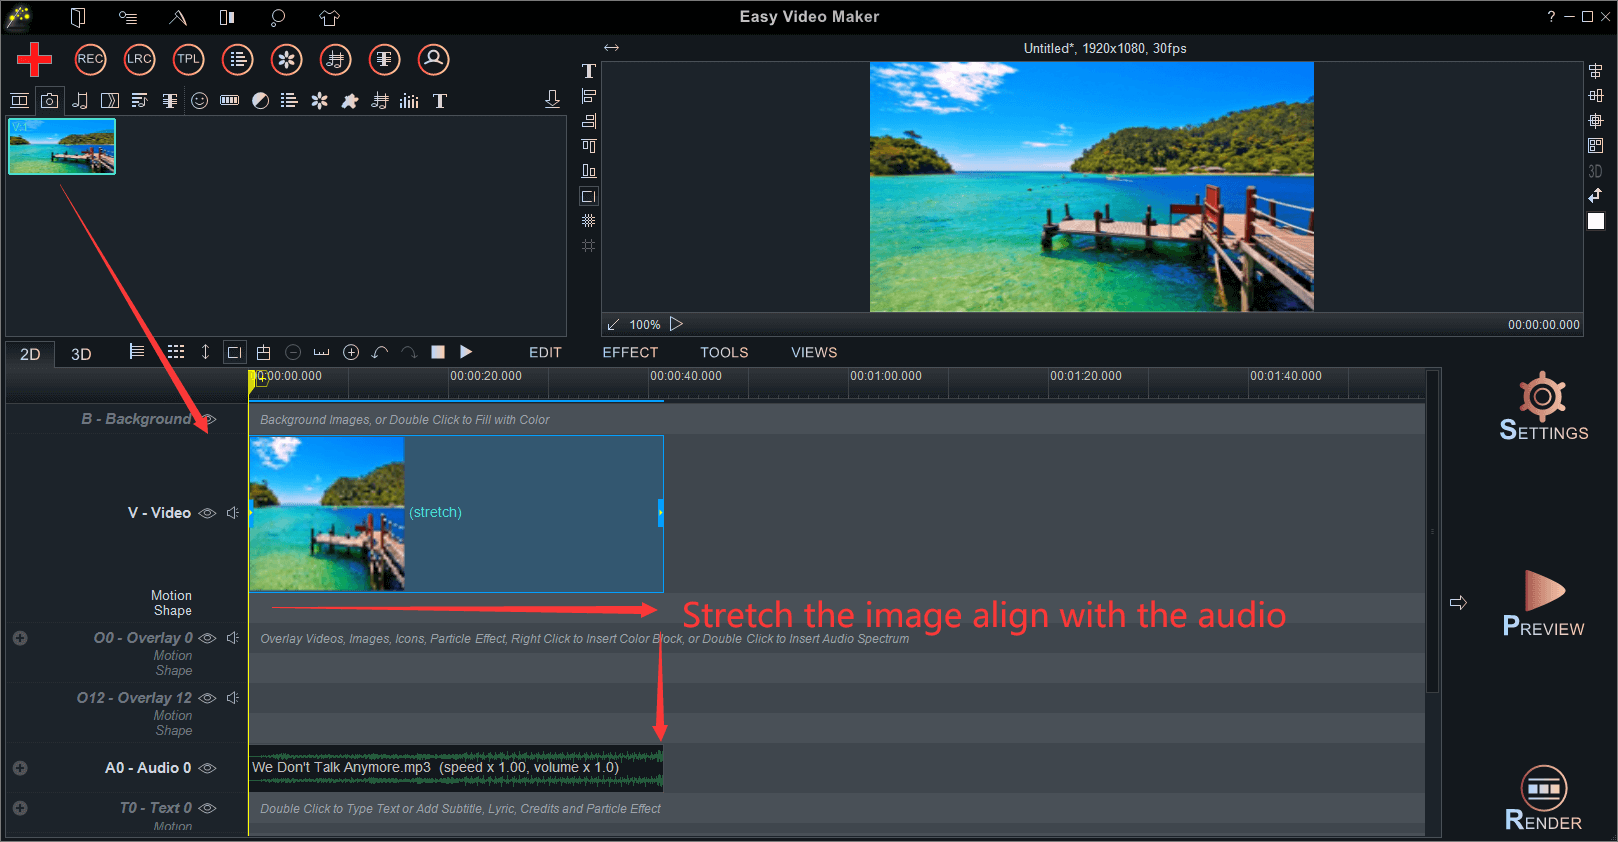
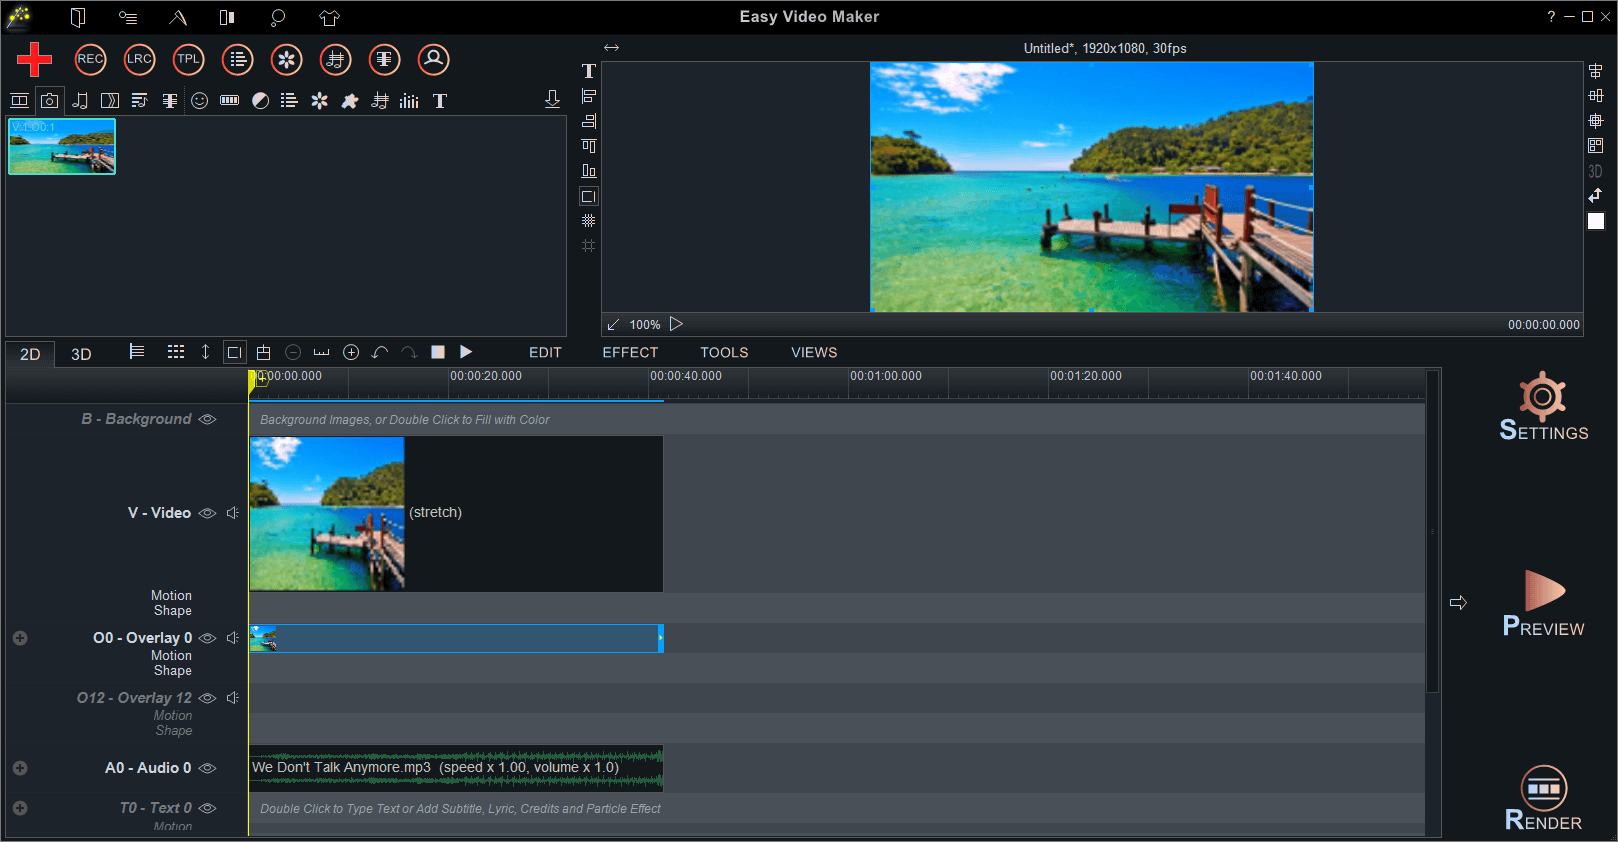
Step 1: Run Easy Video Maker and add a video/static image and an audio as examples. Drag the image down to “Video” line, and stretch the image align with the audio.
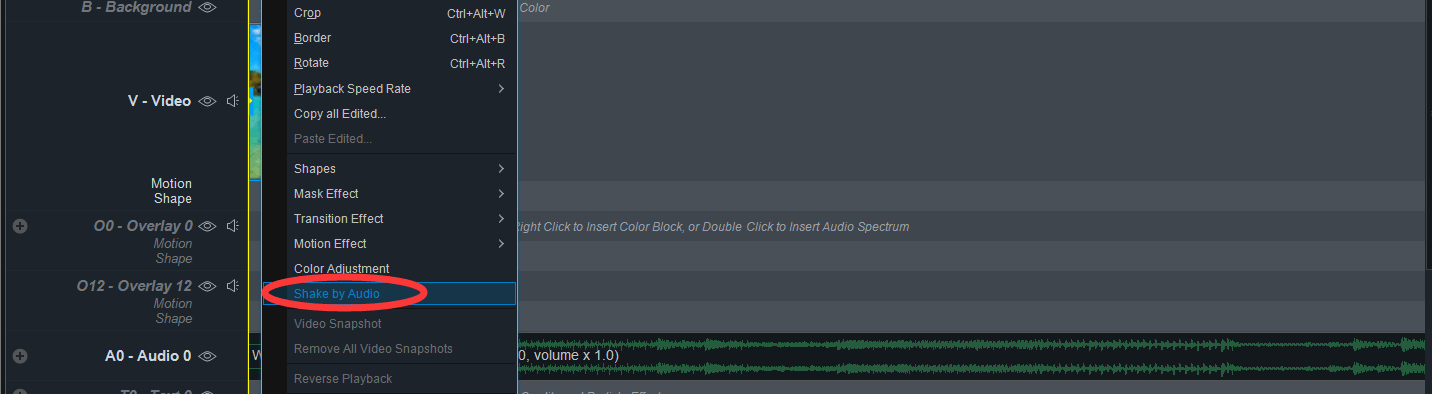
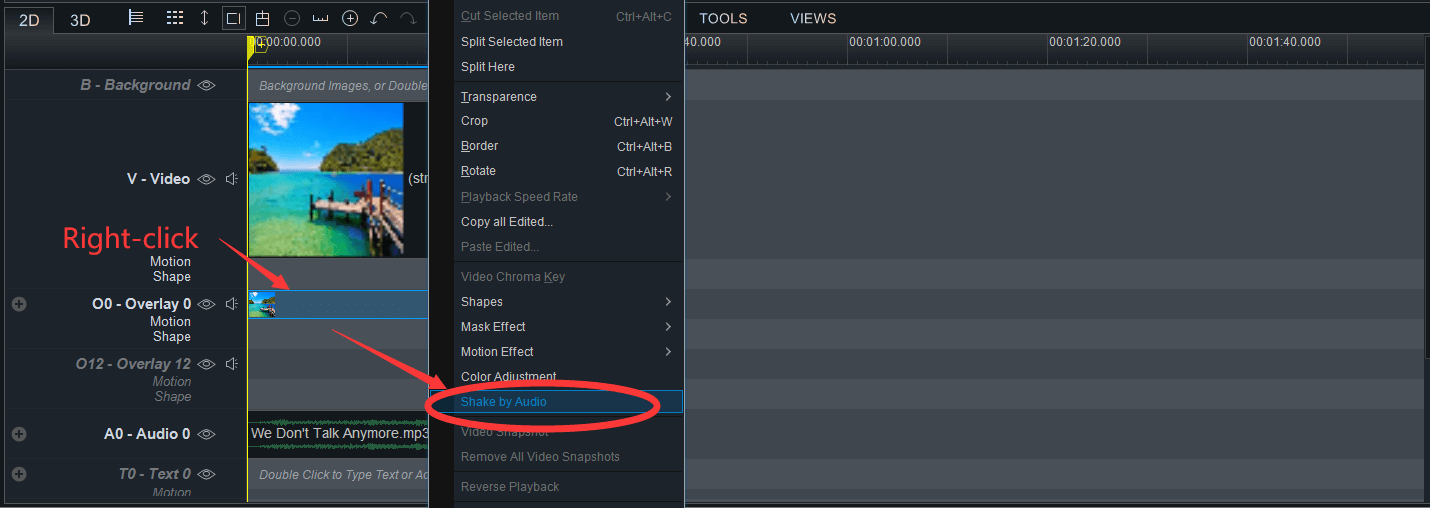
Step2: Next, right-click the image. Find and click “Shake by Audio” in the right-click function menu.
Step 3: Click “Enable” option, and check the first box to change “20%” into “5%” of “Zoom offset Percent”, and check the third box to change “100%” into “20%” of “Transparency Percent”. And then “OK” to save the changes.
Here we change the value of “Zoom Offset Percent” to make the video zoom in/out with the audio beats.
Change the value of “X & Y Offset Percent” to make the video shake at the X & Y axis. Change the value of “Transparency Percent” to make the video become transparent with the audio beats. This is a simple one. If you just need this one, now we can click “Preview” to preview the final video. Finally, click “Render”
  to render and output the final music video.
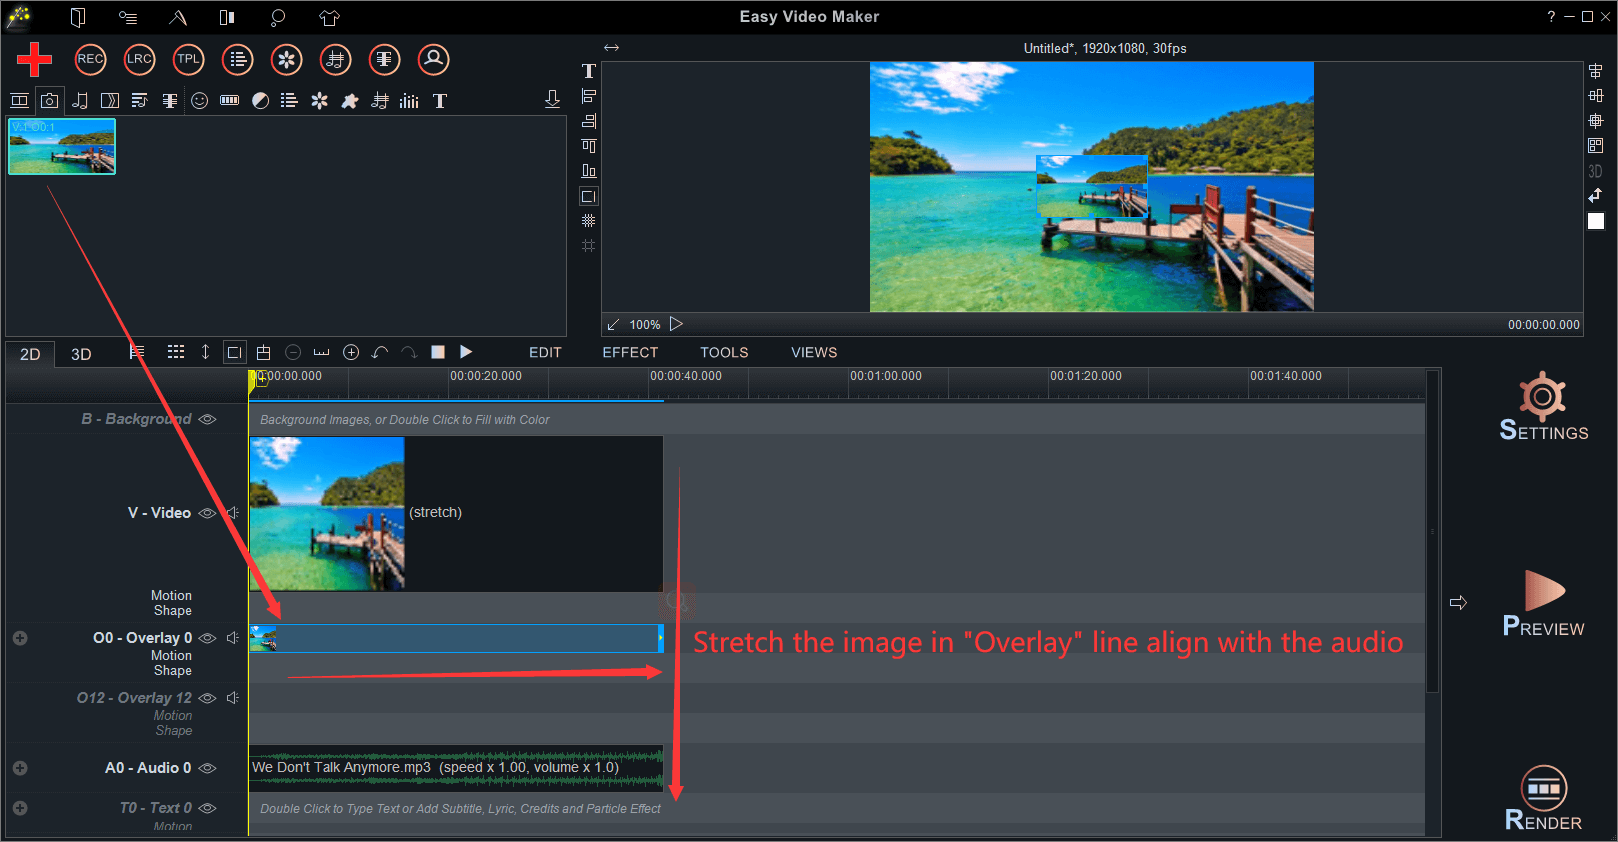
Step 4: Or if you want a more dynamic 3D style shake effect, you could repeat above steps to add a different audio shake effect.
For example, we drag the same image down to the “Overlay” line again. Stretch it to align with the audio.
to render and output the final music video.
Step 4: Or if you want a more dynamic 3D style shake effect, you could repeat above steps to add a different audio shake effect.
For example, we drag the same image down to the “Overlay” line again. Stretch it to align with the audio.
And then, move mouse to the upper right to tap “Overlay Layout”. Select “Overspread” and click “OK” to save the change.
And then, we’ll see a UI screen like this:
Step 5: Next, we still have to right-click the overlay image to find and click “Shake by Audio” in the right-click function menu.
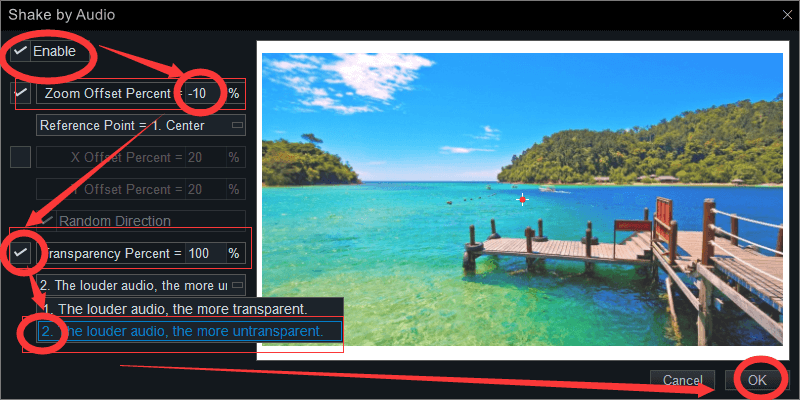
Click “Enable”, check the first box to change “20%” into “-10%” of “Zoom offset Percent”. And then, we check the third box. Choose the second one in the second line. Again, we click “OK” to save the changes.
After that, click “Play” to preview the effect. Finally, we can click “Preview” to preview again. Then, click “Render”
  to output the final music video.
We also made a tutorial video here, check it to get more detailed explanations.
Link.
Try it yourself to see how amazing the effect is in the video.
to output the final music video.
We also made a tutorial video here, check it to get more detailed explanations.
Link.
Try it yourself to see how amazing the effect is in the video.
Let’s see how to add audio shake effect.
Step 1: Run Easy Video Maker and add a video/static image and an audio as examples. Drag the image down to “Video” line, and stretch the image align with the audio.
Step2: Next, right-click the image. Find and click “Shake by Audio” in the right-click function menu.
Step 3: Click “Enable” option, and check the first box to change “20%” into “5%” of “Zoom offset Percent”, and check the third box to change “100%” into “20%” of “Transparency Percent”. And then “OK” to save the changes.
Here we change the value of “Zoom Offset Percent” to make the video zoom in/out with the audio beats.
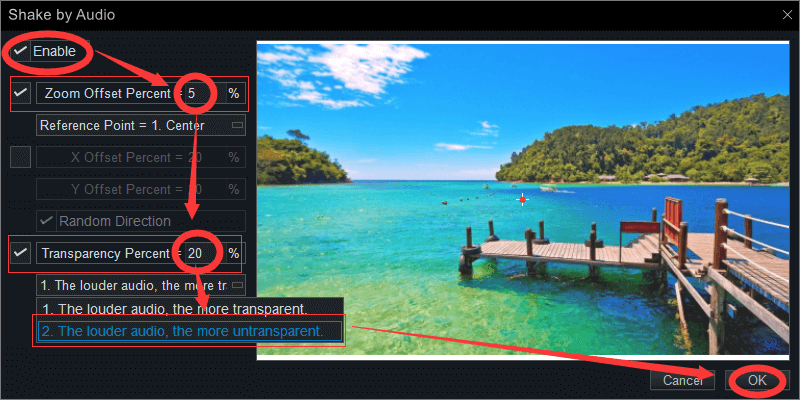
Change the value of “X & Y Offset Percent” to make the video shake at the X & Y axis. Change the value of “Transparency Percent” to make the video become transparent with the audio beats. This is a simple one. If you just need this one, now we can click “Preview”
to preview the final video. Finally, click “Render” to render and output the final music video.
Step 4: Or if you want a more dynamic 3D style shake effect, you could repeat above steps to add a different audio shake effect.
For example, we drag the same image down to the “Overlay” line again. Stretch it to align with the audio.
And then, move mouse to the upper right to tap “Overlay Layout”. Select “Overspread” and click “OK” to save the change.

And then, we’ll see a UI screen like this:
Step 5: Next, we still have to right-click the overlay image to find and click “Shake by Audio” in the right-click function menu.
Click “Enable”, check the first box to change “20%” into “-10%” of “Zoom offset Percent”. And then, we check the third box. Choose the second one in the second line. Again, we click “OK” to save the changes.
After that, click “Play” to preview the effect. Finally, we can click “Preview”
to preview again. Then, click “Render” to output the final music video.
We also made a tutorial video here, check it to get more detailed explanations.
Link.
Try it yourself to see how amazing the effect is in the video.