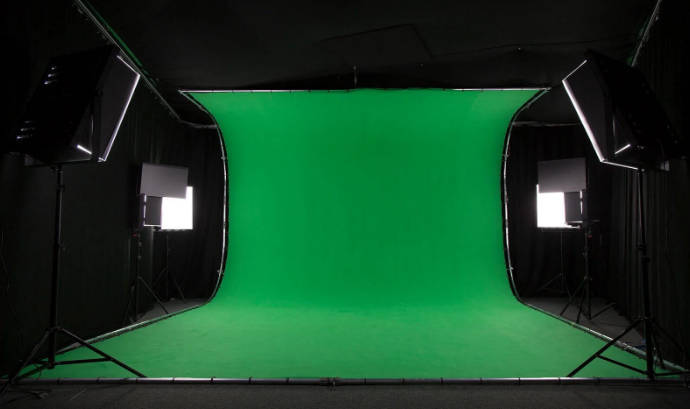
What is a green screen? A green screen is a large green backdrop placed in the background of a shot to allow for digital effects later. In Post-Production, the special effects department will edit the background from green to… anything they want with CGI or background footage.
How Does a Green Screen Work? The process of chroma keying or compositing involves layering two images together.
- The subject in front of the green screen.
- The special effects or CGI put onto the green screen.
Chroma key is a visual-effects and post-production technique for compositing (layering) two images or video streams together based on color hues (chroma range). The technique has been used in many fields to remove a background from the subject of a photo or video. A color range in the foreground footage is made transparent, allowing separately filmed background footage or a static image to be inserted into the scene. This technique is also referred to as color keying, color-separation overlay, or by various terms for specific color-related variants such as Green Screen, Blue Screen, etc; chroma keying can be done with backgrounds of any color that are uniform and distinct, but green and blue backgrounds are more commonly used because they differ most distinctly in hue from any human skin color. No part of the subject being filmed or photographed may duplicate the color used as the backing, or the part may be erroneously identified as part of the backing.
If you have recorded a Green Screen video, you could use Easy Video Maker to replace the the entire background or a portion of it to what you need.
If you can’t get nice effect when editing Green Screen video (Chroma keying), usually because the bad lighting, so you should learn how to light a green screen. Let’s get into it.
Bad green screen and lights result in an uneven tone on camera. Some areas look darker than others. The darker areas become harder to chroma key out afterward, especially if there are transparent objects or fine hair within the shot.
The first tip on green screen lighting is to make sure the subject of the shot is far away enough to avoid light leaks from the green screen. You must also light the green screen and subject separately to give your post-production staff the easiest time later. lIke below pic.
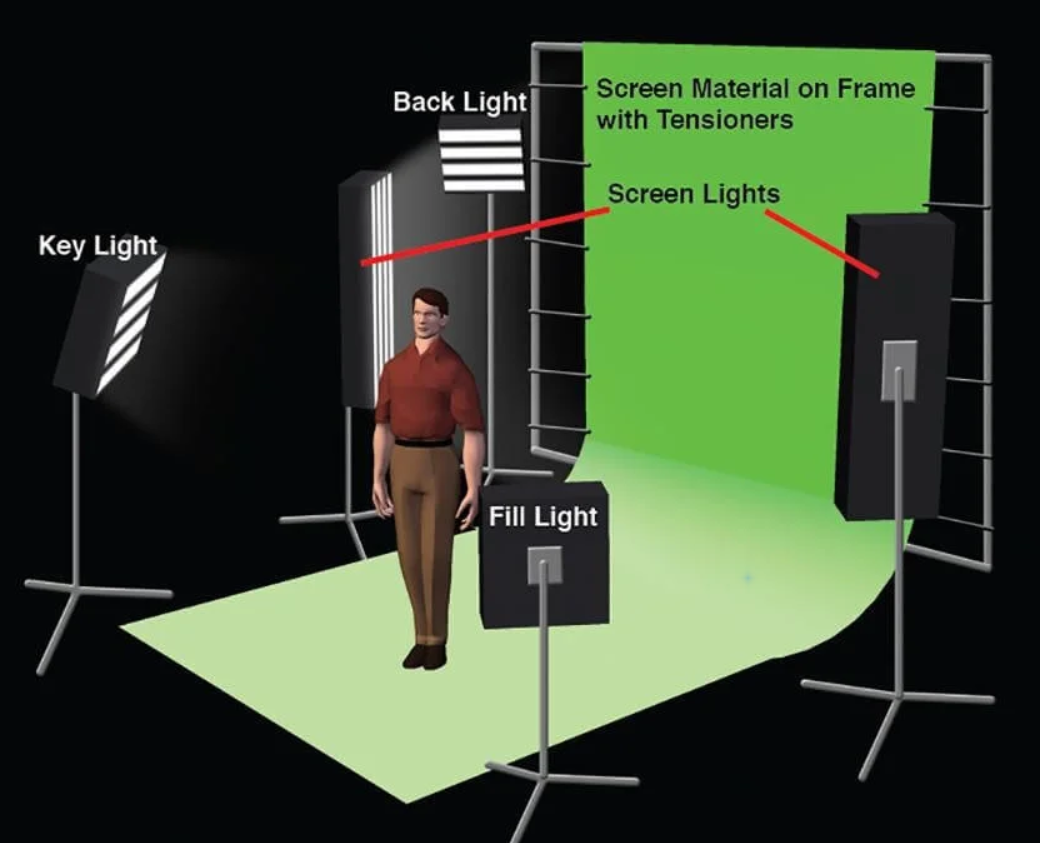
While your exact lighting rig will vary depending on several factors, here’s a diagram of the basic set-up you want for optimal chroma screen lighting. Notice the subject and screen are being lit separately.
Set up the green screen equipment, whether you have a cheap green screen lighting kit or something that rivals most blockbusters, you want to get that situated first. You should smooth out the material if you have a fabric or paper green screen.
A good rule of thumb is to avoid any reflective materials in the shot. Jewelry and glasses can complicate this. If you know you need a green screen for a given shot, then you should keep tabs of what props are necessary and adjust as needed.
You need to get the same lights, it doesn’t matter a great deal what specific lights you get. You just want to make sure they’re exactly the same. Different lights have varying color temperatures. This leads to an uneven color balance.
Light the subject first, after you acquire all of your green screen lighting, you may be ready to get that perfect shade. But before you focus on the green screen itself, you want to make sure the subjects of the shot are properly lit.
In general, your subject should be about eight feet away from the green screen. To light them, you’re going to need the following lights.
Key light: The key light is the predominant light source for the subject. It should match wherever the light source (i.e. the sun, other lights in a building) would naturally be.
Back light: The back light creates a soft halo effect in the subject’s hair. Mostly used when the subject should be in a studio setting.
Fill light: The fill light creates ambiance within the scene and helps soften shadows created by the key light.
You may need to adjust the setup from our diagram slightly. For example, you may need more fill lights depending on the kind of shot you want. That’s okay! But that’s why you need to deal with the subject first. If you light the green screen first, then you may need to change it later based off what your subject needs to do. Then you’ve wasted a bunch of time for nothing.
Light the green screen, once you have your subject the way you want them, it’s time to position the lights to target the green screen. Each light should be the same distance away and at the same angle. This is the best way to ensure an even lighting across.
You’ll notice in these two diagrams that Setup #1 (left) will cast shadows from the subject, while Setup #2 (right) keeps the shadows outside the camera’s field of view.
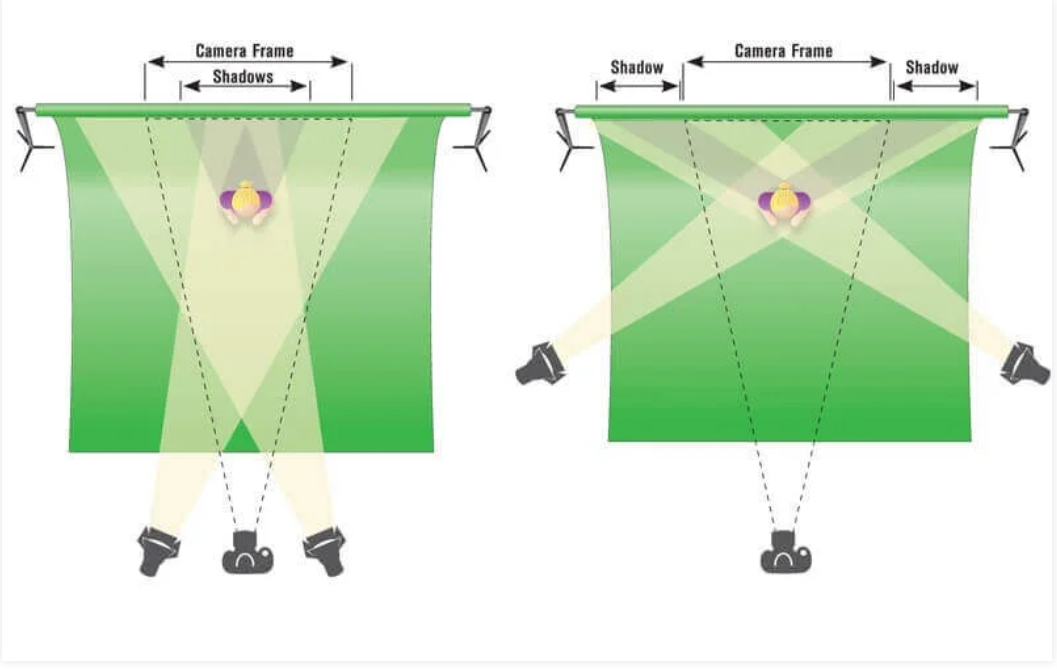
While you can play with different angles, it’s generally a good idea to keep your two green screen lights in a similar position to the right-hand image above. That way the camera doesn’t capture any shadow behind the subject. The shadows instead appear off to the side, away from the camera’s view. All you’re left with is solid green, which is why it’s typically the best lighting for the chroma key later.
Expose the green screen correctly, finally, you want to examine your camera monitor for the exposure. This is how much light your camera takes in. You want a little less brightness than normal so that you don’t capture colors outside of green.
It’s also a good idea to lower your camera’s ISO setting. Sometimes, random specks of color appear in your shot, but you reduce this by lowering the ISO. But make sure not to lower the ISO too much as this can underexpose the green screen and lead to other problems.
Once you adjust your camera, you may find you need to alter a few lights. Go ahead and do that as it saves you a ton of hassle later. Once everything looks good and you have an even green shade across the screen, you’re ready to start a nice green screen video.